Knit decreases are an essential part of your knitting skillset. This simple technique unlocks a whole new world of project possibilities: From hats to sleeve cuffs to raglan-style sweaters, understanding decreases is fundamental to the shaping of knitted garments.
In this guide, you'll find:
- • an explanation of what decreases are in knitting
- • basic instructions on how to knit decreases for beginners
- • an explanation of the difference between two common decreases (K2TOG and SSK)
- • an easy decrease pattern for practice
- • some of our favorite beginner-friendly patterns with decreases!
What are Decreases in Knitting?
A knit decrease is what its name implies: Using a technique to reduce the number of live stitches on your needles.
Decreases are most often used to add different degrees of shaping to your knitting project. Many decreases may be worked across a single row to produce a dramatic effect (think of sleeve cuffs), while one or two decreases worked across multiple rows create a more gradual slope (think of the upper part of a sweater).
The Ballerina, our adorable wrap cardigan, is an excellent example of using decreases to shape a garment. The dramatic balloon sleeves are enhanced by a sharp decrease where the cuffs begin — the total number of stitches are halved in a single round! The angled body of the garment, meanwhile, is formed more subtly. The decreases are spread out across numerous rows, creating a gentler shape.

The Ballerina in Dream: Get the Digital Pattern || Get the Pattern on Ravelry
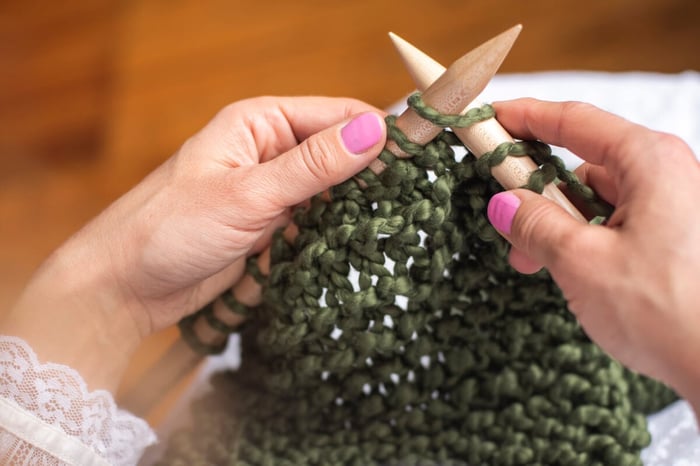
How to Knit Decreases
Decreases are usually achieved by knitting (or purling) two or more stitches together to reduce the total stitch count. Two basic ways to do this are Knit Two Together (K2TOG) and Slip Slip Knit (SSK).
Knit Two Together (K2TOG)
Knit Two Together (abbreviated as K2TOG) is one of the simplest ways to decrease. To K2TOG, you will follow almost the same steps as to do a regular knit stitch. The only difference is that, instead of knitting through one stitch, you will knit through two! Here's a full breakdown:

- 1. Insert the right hand needle as if to knit, from front to back, but insert through the next two stitches.
- 2. Wrap the yarn counter-clockwise around the right hand needle.
- 3. Pull the yarn through both loops.
- 4. Take the stitches off the left hand needle.
Two stitches have become one!
This same concept can be slightly adjusted depending on the pattern. For example:
- • P2TOG: Purl Two Together. Instead of inserting your needle as if to knit, you will insert your needle as if to purl (from back to front).
- • K3TOG: Knit Three Together. Instead of inserting your needle through the next two stitches, you will insert them through the next three stitches.
For more guidance on K2TOG, check out our video tutorial below.
~Slip Slip Knit (SSK)
Slip Slip Knit (abbreviated as SSK) is another common decrease method. This is basically a mirror image of K2TOG. Here's a full breakdown:

- 1. Insert your right hand needle into the first stitch on the left hand needle as if to knit, and slip it onto the right hand needle.
- 2. Repeat Step 1 with the second stitch.
- 3. Insert the left hand needle through the front of the two slipped stitches.
- 4. Wrap the yarn counter-clockwise around the right hand needle.
- 5. Pull the yarn through both loops.
- 6. Take the stitches off the left hand needle.
Once again, two stitches have become one!
Learn more by watching our video tutorial on SSK below.
What's the Difference Between K2TOG and SSK?
You may be asking yourself, "If K2TOG and SSK accomplish the same thing — reducing the number of stitches — why are they worked differently?"
The answer is simple: K2TOG decreases lean to the right and SSK decreases lean to the left! They are commonly distinguished from each other by being called "right-slanting" and "left-slanting" decreases.

Practice Knitting Decreases:
K2TOG and SSK
If you aren't working from a pattern and just want to experiment with knit decreases, try this beginner-friendly swatch pattern using both K2TOG and SSK:

In case you need a refresher, we've provided instructions for each decrease below:
- • K2TOG: Knit two stitches together (right-slanting single decrease)
- • SSK: Slip two stitches (as if to knit) one at a time; return these stitches to the left hand needle in their new orientation, then knit them together though the back loops (left-slanting single decrease)
Best Beginner-Friendly Patterns to Learn Decreasing
Ready to work on your decreasing skills? We've compiled some of our favorite knitting projects to help you master this technique.
Hats
Many hat designs use decreasing near the top to form a snug fit. These are great projects for practicing decreases, thanks to their relatively basic construction and small scope.
 If you want to start with something super simple, check out our Her Beanie (left) and Cotton Beanie (right). Both designs are made entirely with rib stitch — plus a bit of decreasing, of course! — and use super bulky yarn, which makes it extra easy to see your stitches as you knit.
We even have a start-to-finish video tutorial on Her Beanie! Watch it below.
Her Beanie in Merino No. 5: Get the DIY Kit || Get the Digital Pattern || Get the Pattern on Ravelry
Cotton Beanie in Big Cotton: Get the Digital Pattern || Get the Pattern on Ravelry

If you prefer working with lighter weight yarn, consider the Holiday Beanie. This free pattern creates the same classic ribbed beanie look using our worsted weight yarn, Dream.
Holiday Beanie: Get the FREE Digital Pattern || Get the FREE Pattern on Ravelry
Triangle Shawls
To learn both decreases and increases, triangle shawls are the way to go. These sweet and versatile accessories are created by casting on a small number of stitches and gradually increasing until you reach the widest part of the shawl. You then gradually decrease until you return to the original number of stitches.

The Babushka Shawl, for example, is a fun (and fast!) project that's excellent for practicing your increases and decreases. Plus, it's available in two versions: one using Dream wool and one using Summer cotton!
Babushka Shawl: Get the Dream DIY Kit || Get the Digital Pattern || Get the Pattern on Ravelry
(PS: Fringe lovers will want to take a look at the Drama Queen, Babushka's sister style.)

We have shawl designs for our super-bulky yarns, too!
Her Fringe Shawl in Merino No. 5: Get the DIY Kit || Get the Digital Pattern || Get the Pattern on Ravelry
Summer Fringe Shawl in Big Cotton: Get the Digital Pattern || Get the Pattern on Ravelry
Easy Vest
 Ready for the next step after a hat or shawl? This is it! Learn the basics of decreasing with the aptly named Easy Vest — it uses both K2TOG and SSK to subtly narrow the silhouette of the top as it reaches the shoulders.
Easy Vest in Big Cotton: Get the Digital Pattern